 (Image via
You’ve done it. You baked a masterpiece. The cake is perfectly golden, the frosting is swirled just right, and the aroma has been filling your kitchen with sweet promises. Or perhaps it’s a beautiful pie, with a flaky, golden-brown crust and a luscious filling. The moment of truth arrives: you pick up a knife to serve the first slice, and... disaster. The cake crumbles, the frosting smushes, and the slice comes out looking more like a pile than a neat wedge.
It’s a common frustration that can turn a moment of triumph into one of disappointment. But what if you could serve every slice with the clean lines and perfect structure it deserves? Get ready to unlock the secret to flawless dessert presentation! Your beautiful creations deserve a grand entrance, and we’re here to make sure they get one.
The Essential Toolkit for Clean Slices
The secret to a perfect slice isn’t about fancy gadgets; it’s about using the right tool for the job and prepping it correctly. A little bit of technique goes a long way. Here is what you’ll need to have on hand.
- A Long, Thin Knife: A chef’s knife or a serrated bread knife with a long, thin blade is ideal. The length allows you to cut through the entire diameter of the cake in one smooth motion.
- A Tall Glass of Hot Water: This is your secret weapon! Heating the knife blade helps it glide through frosting and cake with minimal resistance, preventing dragging and smearing.
- Paper Towels or a Clean Cloth: You'll need this to wipe the knife clean between each and every cut. This step is non-negotiable for pristine slices.
- Unflavored Dental Floss: Believe it or not, this is a game-changing tool for cutting soft, delicate cakes like cheesecake or mousse cakes.
- A Cake & Pie Server: For lifting the slice out cleanly once it has been cut.
The Ultimate Guide to Perfect Slices
Ready to say goodbye to messy servings for good? Follow these steps for a picture-perfect result, whether you're serving a towering layer cake or a delicate cream pie.
Step 1: Chill Your Dessert
For many cakes and pies, especially those with soft frosting or creamy fillings, a little time in the refrigerator can make a huge difference. Chilling the dessert for about 15-30 minutes before serving helps the frosting and filling firm up. This makes them less likely to ooze or smear when you make your first cut. This step is important for cheesecakes and ice cream cakes.
Step 2: Heat and Wipe Your Knife
This is the most important part of the process. Fill a tall glass or pitcher with hot water. Dip your long, thin knife into the water, ensuring the entire blade is submerged. Let it sit for about 30 seconds to get thoroughly warm.
Carefully remove the knife from the water and wipe it completely dry with a paper towel. A hot, dry blade is the key. The heat will slightly melt the fat in the frosting and filling, allowing the knife to slice through cleanly without dragging.
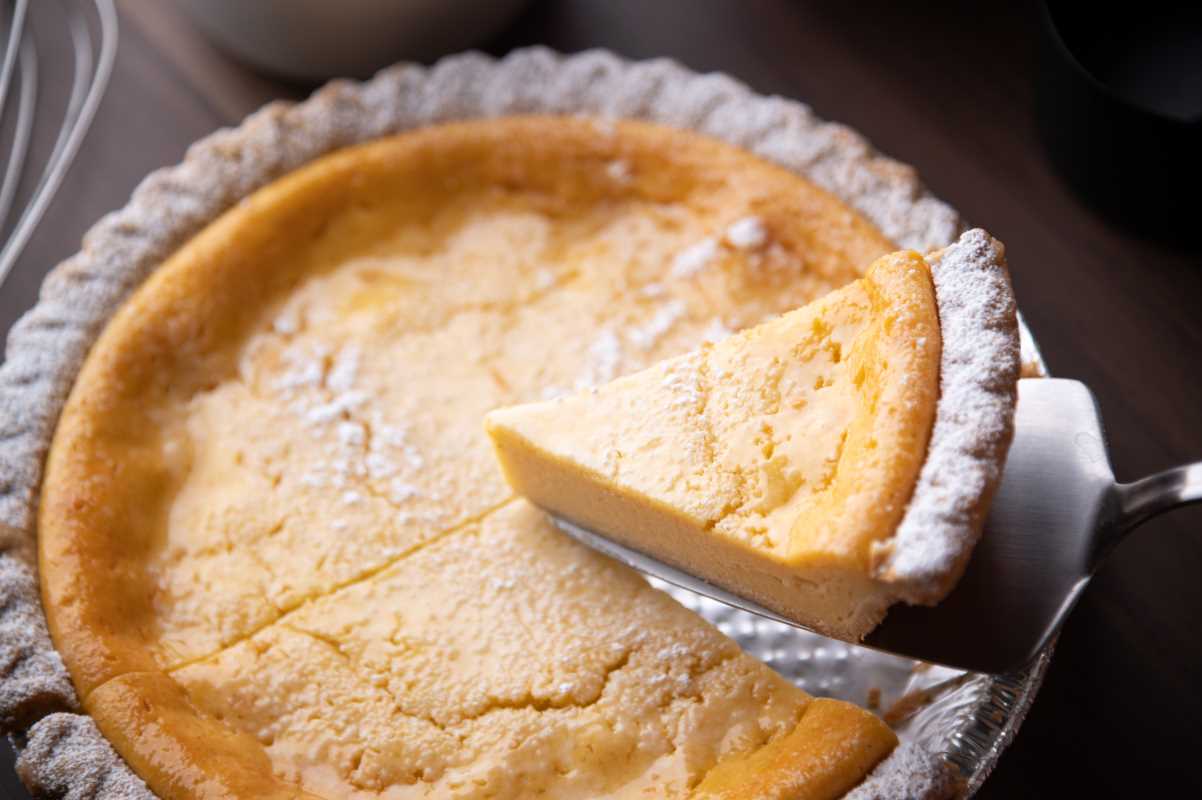
Step 3: Make the First Cut
Position your hot, dry knife over the cake or pie. Instead of "sawing" back and forth, press down firmly in one single, smooth motion from the center to the outer edge. Once the knife reaches the bottom, pull it straight out from the side. Do not drag it back up through the cake, as this will cause smearing.
Step 4: Clean, Reheat, and Repeat
This is the step that separates the amateurs from the pros! Before you make your second cut, wipe the knife completely clean of any crumbs or frosting. Dip it back into the hot water, wipe it dry again, and then make your next cut to create the wedge. Repeat this "heat, wipe, cut" process for every single slice. It might seem tedious, but it is the guaranteed way to ensure every piece is as clean as the first.
Step 5: Lift It Out with Care
To remove the first slice, which is always the trickiest, use a cake or pie server. Gently slide it under the wedge and lift it straight out. Once the first slice is removed, the subsequent ones will be much easier to serve.
Special Techniques for Different Desserts
Not all desserts are created equal. Here’s how to adapt your technique for different types of cakes and pies.
The Dental Floss Hack for Soft Cakes
For extremely delicate desserts like cheesecake, flourless chocolate cake, or mousse cake, a knife can still be too harsh. This is where unflavored dental floss comes to the rescue!
- Cut a piece of floss that is longer than the diameter of the cake.
- Hold the floss taut between your hands and press it down through the cake in one clean motion.
- Once you reach the bottom, release one end of the floss and pull it out through the side.
- This method creates incredibly clean lines with zero drag.
Conquering Crumbly Crusts
For pies with a crumbly graham cracker or cookie crust, the crust can often break apart during slicing. The key is to use a sharp, non-serrated knife and to press straight down with firm, even pressure. Avoid any sawing motions that can disrupt the delicate structure.
Taming Towering Layer Cakes
For tall layer cakes, a standard chef’s knife might not be long enough. A long, serrated bread knife often works best. The gentle sawing motion of a serrated knife can navigate through the layers without compressing the delicate cake structure. Remember to move slowly and use the "heat and wipe" technique between cuts.
With these simple but effective methods in your baking toolkit, you'll be able to serve any cake or pie with confidence. Let your beautiful desserts be admired for their perfect structure, from the first slice to the last.